*This guide applies to basically any LInux Desktop which uses Network-Manager.
Step 1 - VPN Connections
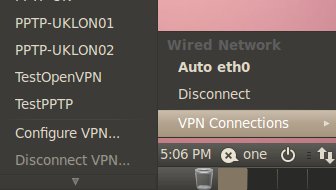
Click on Your Network Connection icon (in our example it's on the bottom right and is 2 arrows facing up and down) and you'll see the "VPN Connections" menu.
Click on "Configure VPN".

Step 2 - "Add VPN Connection"
Click on the "Add" button as shown below.

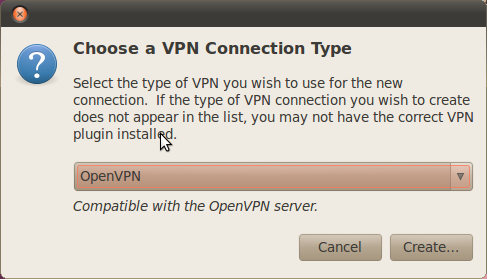
Choose OpenVPN as your connection type.
Click "Create"

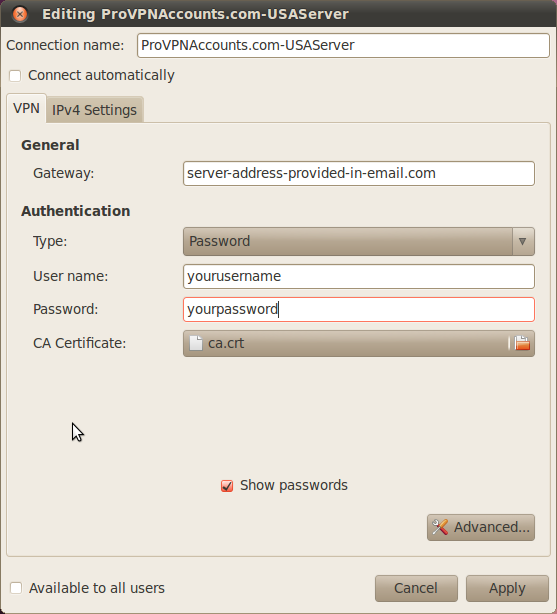
Fill out the form below:
Connection name: Call it anything you want but we recommend mentioning the location of the server at least.
Gateway: This is the address of the server provided in your setup information.
Type: Password (you must choose Password)
Username: Enter your username
Password: Enter your password
CA Certificate: browse to the "ca.crt" file which comes from the OpenVPN.zip attached to your setup information.

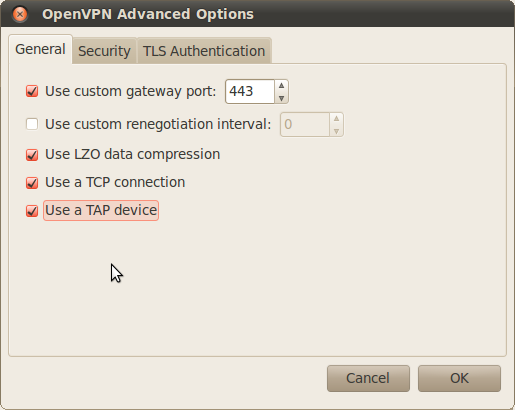
Click "Advanced" above and you will see the following screen:
Be sure to set everything as shown below or it won't work.
Be sure to ticket all the boxes as shown.
Then click "OK"

Click "Apply" back on the main settings window and now you're ready to connect.
Open up the VPN Connections and then click the new connection you made.
In this case you'd click "ProVPNAccounts.com-USAServer" or whatever you called your connection.

ubuntu, openvpn, applies, linux, desktop, vpn, connections, icon, arrows, ll, quot, configure, mentioning, server, gateway, provided, password, username, ca, certificate, browse, crt, zip, advanced, ok, settings, provpnaccounts, usaserver,